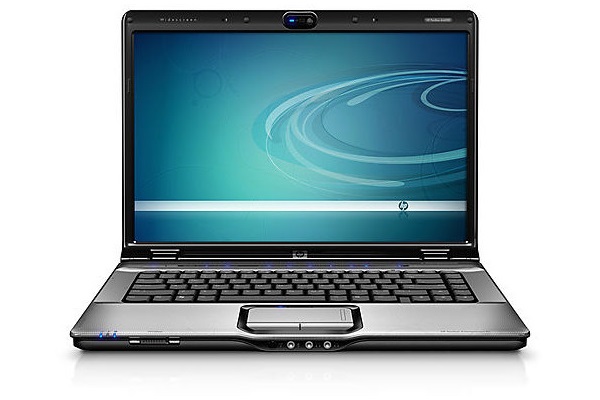
A week ago, I had the enviable task of taking out the garbage. As I plopped my bag into the trashcan, I spied a laptop - with a power cord - sitting in the bin. I’m always partial to a used computer, so I did what any good geek would do: I grabbed the laptop and brought it home.
After a quick cleaning with Lysol wipes, I took a quick inventory of the machine. The laptop was a HP dv6000 with a dead battery and a missing HDD. When I plugged it in, however, it powered up without issue. Working screen? Check. Detectable CPU and RAM? Check. Installed WLAN card? Check. Looks like this is my new laptop! Here’s a run-down of what it looked like:
| Compenent | Specification |
|---|---|
| Chipset | Intel G965 |
| CPU | Core 2 Duo T5550 (Merom, 1.83GHz, 677MHz FSB) |
| Memory | 2 x 1GB Hynix PC2-5300 DDR2 |
| HDD | None |
| WLAN | Broadcom BCM94312 (Wireless G) |
| Graphics | Integrated (GMA X3000) |
| Screen | 15.4” @ 1280 x 800 |
Upgrading Laptops
Although new laptops typically come with few (or no) replaceable parts, older laptops (like my also-dumpster-retrieved Dell Inspiron 9400) gave you the ability to swap out CPUs, memory, WLAN cards and more. The only thing limiting you was your set of tools and stomach for potentially breaking something. Here’s a completed list of my upgrades:
| Compenent | Specification |
|---|---|
| CPU | Core 2 Duo T9300 (Penryn, 2.5GHz, 800MHz FSB) |
| Memory | 2 x 2GB Samsung PC2-6400 DDR2 |
| HDD | Samsung 850 EVO 120GB |
| WLAN | Intel Dual Band Wireless-AC 3160 |
Replacing the CPU
This HP laptop uses the Intel G965 chipset which supports Core 2 Duo chips in Socket P and up to an 800MHz FSB. The installed processor was an Intel Core 2 Duo T5550 (1.83GHz) Merom, running at a 667MHz FSB and manufactured with a 65nm process. These Core 2 mobile chips aren’t competitive with the current i-series, but the newer and smaller-process (45nm) Penryn generation of the Core 2 Duo chips featured a larger L2 cache, cooler operating temps and a reasonable boost in performance with an 800MHz FSB speed.
A used Core 2 Duo T9300 processor (Penryn, 800MHz FSB, 2.5GHz, 6MB L2 cache) matches the socket, runs at the same wattage (~35w) and costs ~$30 on ebay. Easy! This was one of the first parts I swapped out. Along with a decent application of thermal paste on the CPU and integrated GPU, the system now runs ~ 20C cooler under load (maxes out in the mid 60C range).
Swapping the Memory
Memory upgrades are extremely simple. I purchased 2 x 2GB Samsung PC2-6400 (which can run at an 800MHz FSB, instead of the previous PC2-5300 that only runs at 667MHz) for $25 on ebay.
Prices on older generation memory are an interesting study. There’s a definite sweet spot: too new and you’re paying near the original price, too old and you’re paying extra due to scarcity. DDR2 modules are in the sweet spot where supply is plentiful and costs are low.
Installing a SSD
This laptop supports SATA 2 (3Gbps). It’s not the latest specification (SATA 3, 6Gbps), but I’ll be able to get excellent performance from an SSD. I generally swear by Samsung’s drives - I’ve installed probably 10 of them between my personal devices and the laptops of family members/in-laws. The Samsung 850 EVO drives are now selling for the same price (or less!) as the previous generation Samsung 840 EVO, making this a no-brainer. I grabbed a Samsung EVO 850 (120GB) and was off to the races.
Upgrading the display?
Once I got the machine running, I immediately started looking for an upgrade to the display. A journey to change a laptop display is fraught with peril. Even if your model of the laptop was initially sold with different screen resolutions, potential pitfalls abound:
- Cabling could be different for a panel with higher resolution
- System board might not have the proper connector
- If you have integrated graphics, your system might not be able to render the resolution properly
You could look for just an LCD swap, but you may still run in to the same issues.
Unfortunately, this laptop was only sold with a 1280 x 800 display. There’s no easy upgrade path short of swapping an LCD into the display frame. Based on the screen specifications, this may be an option for me (the slightly newer model dv5t was sold with a 15” 1680 x 1050 display with matching LCD dimensions and what looks to be similar specifications for the cabling and connectors). If prices drop a bit on the LCD, I may bite the bullet.
WLAN Upgrade
This should have been straightforward. Purchase a new mini-PCI card, swap it with the old one and - presto! - upgrade complete! Unfortunately for me, HP (along with several other vendors) have built a WLAN card whitelist into their BIOS. Unless I were to modify the BIOS on my machine, there was no way I could upgrade my wireless connectivity.
That left me only one option: time to hack the BIOS!
Next: The joys of little-endian - OR - modifying the BIOS for an HP dv6000.